Over the summer months, I have been working steadily on my model's topside planking, while it seems the real Terror has been biding her time, waiting to reveal herself to the world. Despite the excitement of the discovery, my work continues, though perhaps with somewhat more adrenaline than previously.
I began this part of the project by cutting out the numerous ports on Terror's bulwarks, and then proceeded with planking the entire topside down to the level of the chock channels. The planking followed a carefully laid out plan that I devised for the entire model.
Based on data in 1845 stern plans by Oliver Lang, the strakes on my model Terror vary between nine and ten scale inches wide whenever possible. Consistent with information gleaned from the original ship's contract, each strake is approximately 24 scale feet long (where possible), and follows a three plank shift. Deviations from this plan were necessary in many portions along the topside, where ports interrupted the normal planking layout (and common sense indicated a butt would not be necessary).
 |
I marked the position of the port sills using paper guides (this is the reverse
of the printed plan, used on the port side) |
 |
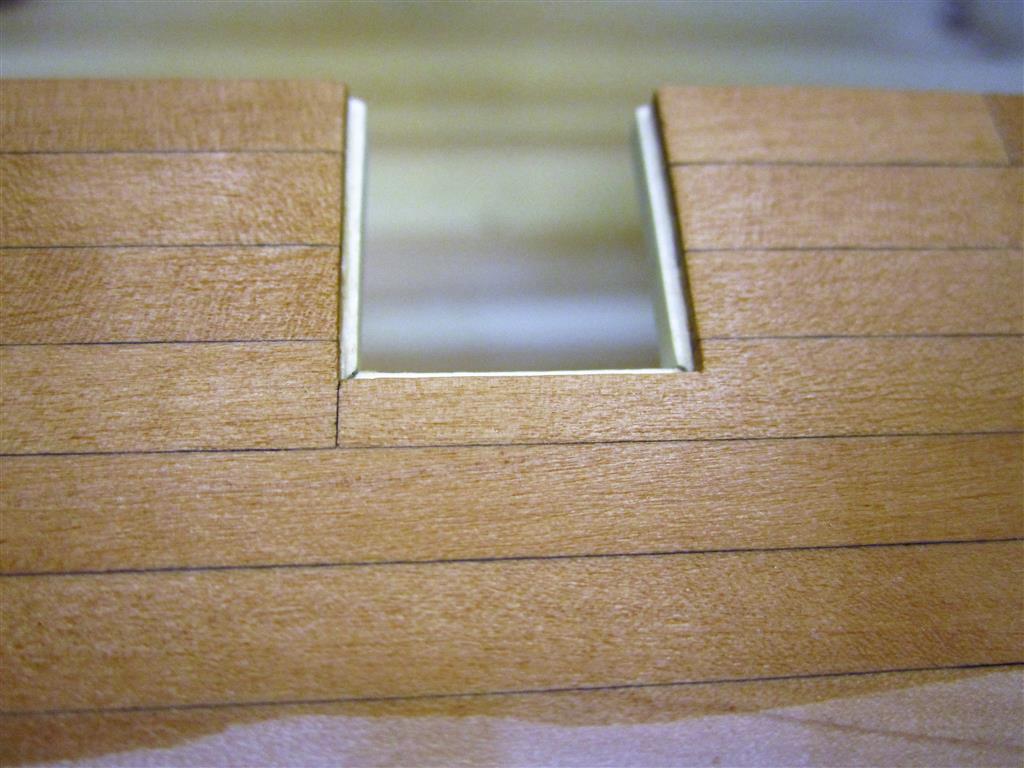
| Each port was carefully cut out with a sharp blade. |
 |
| The port sills were lined with holly. |
 |
Terror's bulwarks were riddled with ports. Here the bitts have been modeled
from Swiss pear and are portrayed in an unworn condition. |
 |
| Details of additional bitts. |
 |
In the stern, Terror had two large chocks on each side. These were cut from Swiss
pear sheet stock and the correct shape transferred to them from a card cutout. |
 |
| Ensuring the chocks are symmetrical. |
 |
| The finished pieces. |
 |
| And again after installation. |
 |
Planking began at the solid ice channels and proceeded strake by strake (tier by tier), following the
plan I had devised. Terror has an extremely bluff bow, and care had to be taken here. While spiling
would be preferred, I am constantly worried about my wood supply and used a technique taught
by Chuck Passaro. It worked very well, despite planking in scale thickness (here 4"). |
 |
The port side, after a coat of Minwax Wipe on Poly. Note the bottom
strake is left untreated so that I can glue the ice channel top to it. |
 |
Comparing the symmetry of planking on both sides of the knee. Following
the planking plan and marking off the hull carefully ensures
less variation. |
 |
Terror's bow is so bluff, and the scale plank so thick, that I resorted to using a plank bending tool
to achieve the proper curvature. I dread planking the second layer on the wales, which
are over 9 scale inches thick! I expect hot water immersion , or hot iron bending,
will be my only option there. |
 |
| Planking surrounding the many ports at Terror's bow. |
 |
The planking plan indicated that one plank, in particular, would be very complex.
I measured and marked it off carefully before cutting. |
 |
Installation involved dry fitting, careful sanding, dry fitting again, sanding again, and
repeating constantly until it was acceptable. |
 |
| Planking amidships, showing the three plank shift. |
 |
| Detail of the chocks after planking. |
 |
| The completed planking run on Terror's starboard side. |
The next task in my project will be to frame the stern lights (windows) and install them. Until then, I hope we get to see more images of the
real ones from Franklin Expedition 2016.


Great , detailed work with fine documentation ! When the Terror was refurbished in 1845, do you think the shipwrights replaced the iron nails, which might have rusted after the Antarctic exploration ? if so, do you have any thought as to the dimensions of those nails ? Remember , a blacksmith forge was found on Beechey .
ReplyDeleteAttractive section of content. I just stumbled upon your site and in accession capital to assert that I get in fact enjoyed account your blog posts. Any way I’ll be subscribing to your augment and even I achievement you access consistently rapidly. Alexandr Shcolyar
ReplyDelete